Installing a new sink requires identifying the sink type, mounting method, and necessary tools before starting. The guide walks through removing the old setup, labeling components, and preparing the cabinet area. It then covers installing the new unit, leveling the opening, and aligning hardware, followed by connecting supply lines and drainage. Sealing joints with silicone or plumber’s putty and testing for leaks are essential. Potential alignment or moisture issues may arise, warranting careful troubleshooting to ensure a reliable installation.
Identify Your Sink Type and What You’ll Need
Identifying the sink type and assembling the necessary materials is the essential first step in any installation. This section records objective classification of sinks and the corresponding tool set.
Thorough analysis of mounting methods, drain compatibility, and fixture dimensions guides preparation.
Critical actions include identifying sink types and listing essential plumbing tools, ensuring accurate component choice and efficient procurement for precise, reliable work.
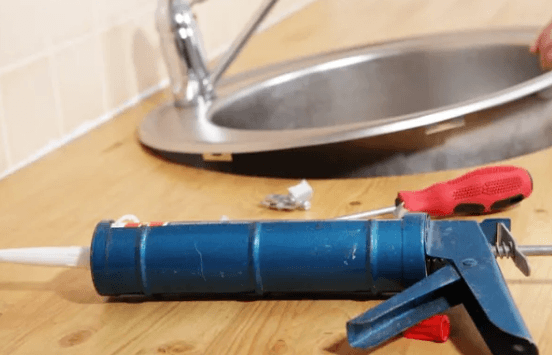
Remove the Old Setup and Prep the Space
The old sink setup should be removed methodically to prevent damage to surrounding surfaces and plumbing.
Systematically disconnect supply lines, trap, and soffit supports with appropriate tools, labeling components for later reassembly.
Clear debris, inspect cabinet floor for moisture, and seal openings.
Tips for budget friendly upgrades; DIY tool storage habits should guide organization and future maintenance, enhancing efficiency and freedom.
Install the New Sink and Connect Plumbing
Before proceeding with installation, ensure the cabinet opening is clean and level, and verify that the new sink matches the countertop cutout dimensions.
The section describes securing the sink, aligning mounting hardware, and connecting supply lines and drainage.
Emphasize installation considerations and material compatibility to prevent leaks, corrosion, or warranty issues while maintaining a practical, freedom-oriented workflow.
Seal, Test for Leaks, and Troubleshoot Common Issues
After securing the sink and establishing proper alignment, the next step involves sealing joints, testing for leaks, and addressing common issues. Use silicone or plumber’s putty as specified, then tighten connections incrementally. Run water to observe drips; inspect under-sink plumbing for seepage. If leaks occur, re-seal and adjust. Discussion ideas should avoid irrelevant topics, maintaining focused, practical troubleshooting.
See also: Careers in Cryptocurrency and Blockchain
Frequently Asked Questions
How Long Does a Typical Sink Installation Take?
Typically, a sink installation takes several hours, depending on plumbing and cabinet conditions. Quick install may shave hours with precise timing tweaks, but variables persist. The schedule allows for unexpected adjustments, ensuring reliable connections and secure mounting without haste.
Can I Install Without a Helper or Pro Tools?
Installing sink can be done solo with DIY basics, but tool needs are modest and a helper absence increases risk. The approach requires careful measurement, sealant, wrenches, and clamps; foresee leaks, plan routing, and proceed methodically rather than improvising.
What if My Countertop Is Damaged During Removal?
Countertop damage requires assessment; if structurally compromised, replace sections or full sheet. What to do about damaged countertops: document defects, consult manufacturer guidelines, and consider professional repair options for seamless results. Repair options for damaged countertops include patching, resurfacing, or replacement.
Are Special Disposals Compatible With All Sinks?
Special disposals vary by model and mounting; compatibility is not universal. Sink compatibility must be verified via flange size, connection type, and amperage. They require matching standards and professional guidance for safe, freedom-respecting installation.
How Do I Choose a Faucet for a Compact Space?
A surprising 60% of homeowners report space constraints influence faucet choice. For a compact space, select a faucet size that fits baseline clearance and reach, prioritizing low-arc designs and slim handles to maximize usability and freedom.
Conclusion
Ultimately, a well-executed sink replacement hinges on precise measurement, secure mounting, and meticulous sealing. Each step—from identifying the sink type to testing for leaks—builds toward long-term reliability. As the adage goes, “measure twice, cut once”—applied here as measure twice, install once. When connections are aligned and joints are properly sealed, moisture intrusion is minimized, and cabinet integrity is preserved. A methodical, documented approach yields dependable performance and easier future maintenance.